Thursday, May 15, 2014
Sunday, April 6, 2014
Where does one begin?

Gardening is a love. It is a gift to those who reside there, look into it, get to work it, for visitors and for future generations. The desire to get stuck into the dirt, compost and mulch usually overrides the ability to claim this part of gardening a chore.

As a teacher I use my holidays to recharge the battery and to cleanse the soul. Nothing cleanses the soul like a lovely day's work in the garden. The benefit is watching one's efforts contribute to the overall feel of creating a peaceful yard where one is surrounded by plants that will mature beautifully. The gift from this effort is the fact that we get to appreciate the garden now and with age.
I love nothing more that to sit on the freshly mown grass while tending plants within reach. The fresh grass and "earthy" smell seems to carry me away to places I have been before. I think of the plants my Grandmother and Nana grew, and, the many gardens I have toiled in my life. I recall many different memories and have a lovely time reflecting, refreshing my memories of people I have met on my journey. Of late I have been gardening with my iPod playing Tina Arena's album Reset All! Every song is beautifully written and is perfect for those of you like to sing and those who love great lyrics presented with clarity and meaning.

 When we initially bought the house we had many potted plants, as gardening has always been a passion, even in rental houses we had lived in. We simply 'quick planted' many of them purely to get them going. We were lucking in that I had a knowledge of what plants to place where - shade, sun or dappled shade. In our first year we spent time creating the bed and tending the many plant we had thrown in. Over the course of the next two years we purchased numerous plants and have created many beds in our desire to have a lovely yard. We are in that wonderful part of Garden creation and construction, where every bed we redesign and make over, we are able to fill with plant stock we have been growing. This is not to say that I do not need to buy plants, "Of course I do." Many of our beds are about to take the next step with us lifting and planting, for effect rather than survival. We have decided that the pool yard will be the next one to get a make over. We planted close to 200 bromeliads, different ginger varieties, bamboo and agaves when we initially made it over nearly a year ago. We have some lovely big plants that we will now be able to feature. We are simply going to lift, thin, tidy up and mulch the existing beds before we landscape. If I can afford them I am going to hunt down three large Silver Plum Alcantarea. These bromeliads make a lovely statement. This photo does not do the plant justice. I adore the rich colour with the dust grey colour.
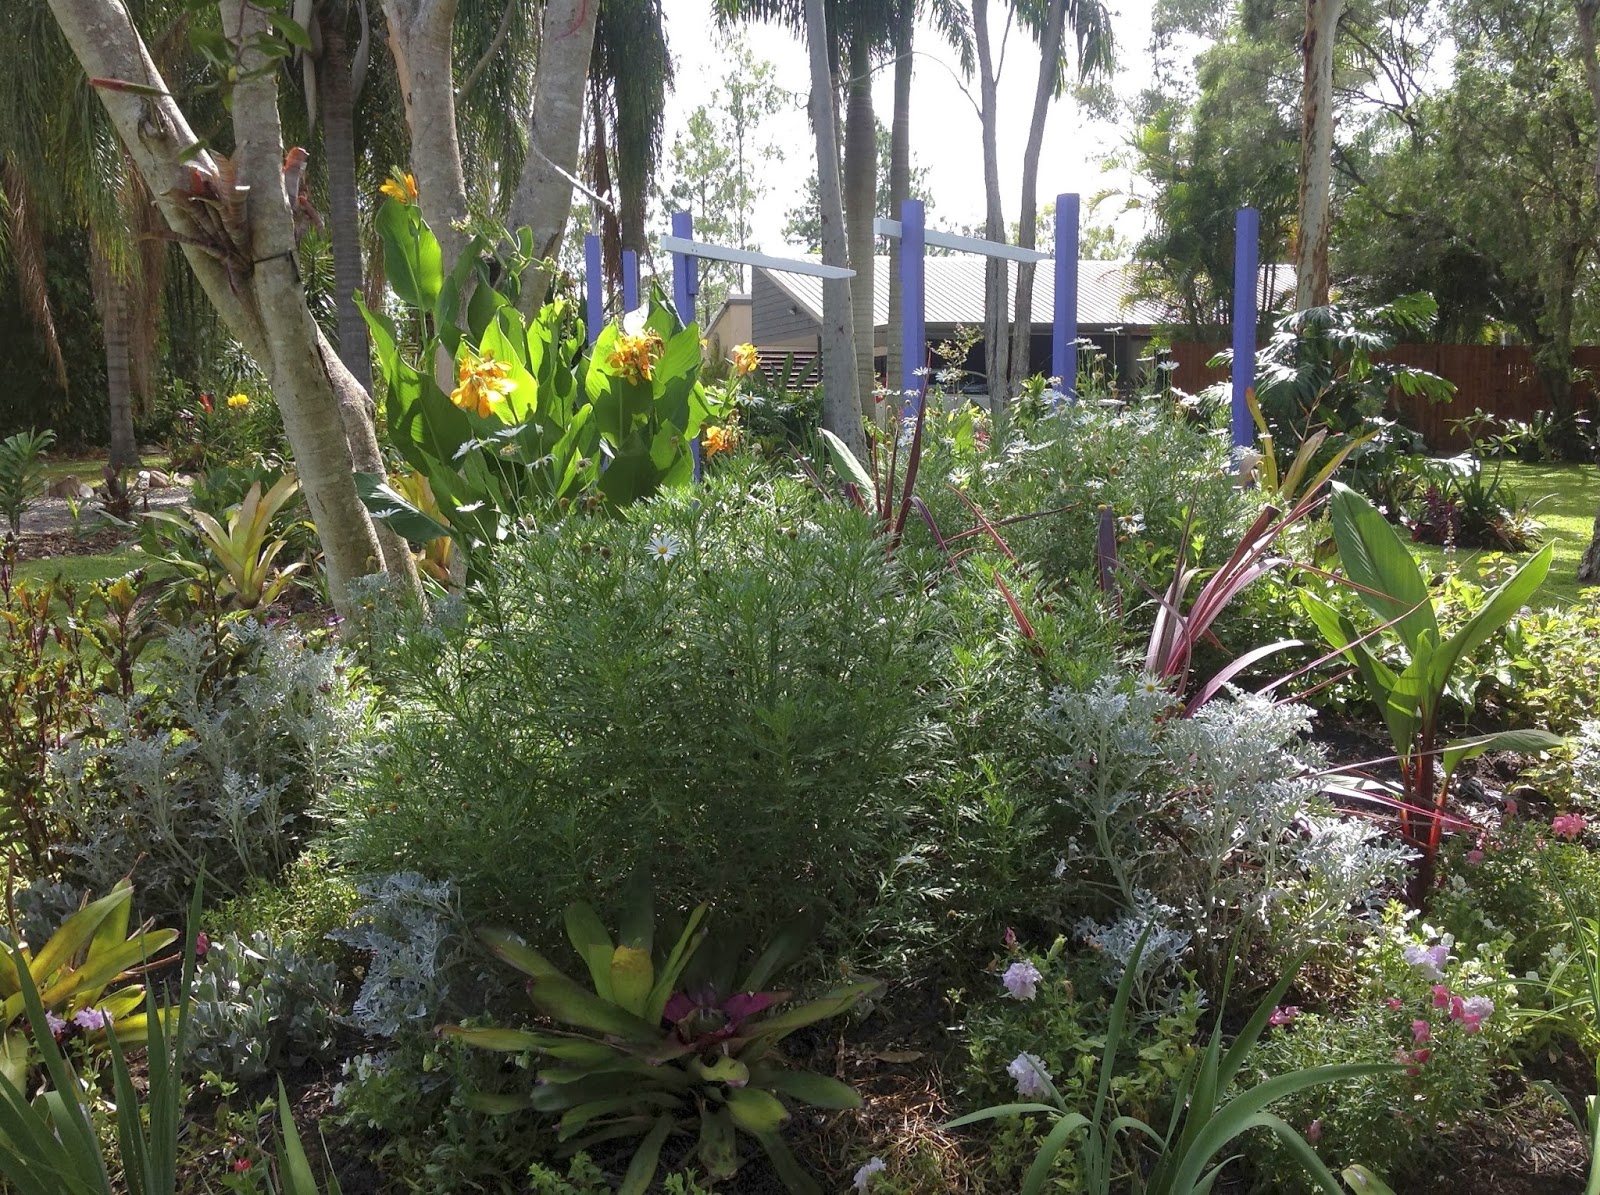
 In a previous blog entry I shared the construction of our gazebo. It has been lovely to watch the plants acclimatise to this new area. The plants quickly grew into the space, and now looks like a mature bed. The purple colour is the exact shade for the purple agapanthus that we have scattered around the yard. I am really looking forward to seeing them in bloom, as they will simply welcome the gazebo into the wider picture. To continue this theme I have planted blue and white petunias, mottled pink and white pelargonium, rich blue cornflowers and erlicheers. This would make for a lovely display should the rain assist.
 It is amazing how a stepping stone path and a cluster of plants can make a huge different to the overall feel of the garden. I have planted 20 small alcantareas around this raised bed pictured above. With time, the agaves and the alcantareas will make a lovely display, softened by cottage plants, of all things. Watch this space!
People often ask me for gardening advice and I sometimes surprise myself with what I have learned by osmosis, over the years. I think the most critical advice I could give would be that - every good gardener has a rough patch. For some of us we have had time and opportunity to get to know the different micro climates we have for different garden beds around our yard and house. Identify the conditions of the bed - morning sun, hot sun, full shade, dappled shade, strong winds, radiating heat from concrete and brick structures.

If you take note of these elements and then find plants to grow with those elements, you should be right. Too often I think people rush in and buy everything that they like, plant it and then struggle as the plants die. Most times it may not be a matter of not having a green thumb, but rather the wrong plant matching.
Another big mistake a lot of people, myself included, make is to buy plants with the greatest intentions and leave them in the pot where often they get neglected and die. Once dried out for a couple of days it is can be difficult to bring the plant back. Even the greatest of gardeners will tell you that they too have done this. I will often leave a plant it it's pot, dug a little into the ground, to let the plant acclimates. This gives me time to watch the elements and the impact it may have on the plant.
Be brave, go for a drive or even better, a walk, and observe the gardens in your area. Be brave enough to compliment the creator/carer and then hit them with advice. The knowledge of your "new friend" may contained could be unlimited. A keen gardener in your area will give you far better advice than can most of the "hardware store" type nurseries. You never know, you may well be walking away with a few cuttings. A gardener is always willing to talk things garden. They have the time to share, to show and possibly even, to demonstrate something you may be asking.
Until later,
Happy Gardening.

Friday, January 17, 2014
A Gardener's Dream - our latest project.
Well, I have achieved a tick against one of my Garden Task Bucket List. We have built ourselves a pergola and I have planted a wisteria to grace it. I have adored the look and the smell of wisteria since I first say one many years over an arbour that lead from a friend's house all the way through the yard to her garage. This photo I found on PinInterest. It does not belong to me. I have planted a white wisteria and two stephanotis plants over the arbours.

For some time I have been hinting about the need to build a gazebo onto which we could plant a wisteria. Finally, we agreed that an ugly area in the front yard would be ideal. This would provide us with a place where we could sit with a cool drink and admire the garden, the labour of love. The previous owners were Cocos Palm fans and we are adamant that eventually we will remove every one of them in order to help reduce mayhem on our national parks when bats drop their seeds.

 So with a barren piece of land towards the front of our block we decided to be creative.
 Our apprentice was more than willing to tell us if the paint had dried.

While we were building our pergola we also decided that a strip of paving needed to be built in order to provide us easy access, and to tidy up the rock edges of the garden bed on the left and the barren area along the side of the carport.

 Before we put the pergola together we played with different spacing ideas. We decided to start with the large, middle and small white beams and then decided on placing three purple strips. The gaps between each beam corresponds to the width of the preceding beam. We chose purple as a feature colour as it is a perfect match to the purple colour found in the agapanthus scattered throughout our garden.


For some time I have been hinting about the need to build a gazebo onto which we could plant a wisteria. Finally, we agreed that an ugly area in the front yard would be ideal. This would provide us with a place where we could sit with a cool drink and admire the garden, the labour of love. The previous owners were Cocos Palm fans and we are adamant that eventually we will remove every one of them in order to help reduce mayhem on our national parks when bats drop their seeds.
We cleared out a total of six palm trees, with five more to go. The palm lined driveway in only half lined.
We designed the pergola in three verandahs. Each one slightly shorter than the previous. The staggered height matches the staggered heights of out nearby water feature. This is a shot looking from the front of the yard to the house.
Well this is our unfurnished pergola. A little bit of Bali in the front yard. I have planted Magnolias in the pots that grace the entry and the side of the pergola.
We like it! Well that is a lie, we love it!

Tuesday, December 17, 2013
Pad Thai

The measurements are simply a guide as I tend to cook from the heart.
You will need:
- 400g dried flat rice stick noodles
- 2 tablespoons peanut oil
- 2 eggs lightly beaten (I use four as we have an abundance of eggs)
- 1 onion cut into thin wedges
- 2 cloves of garlic, crushed
- red capsicum - 1/2 large
- 100g of fried tofu - trust me, do it - there is a lovely thai flavoured one in the vegetarian section of most supermarkets
- 6 spring onions sliced on the angle (go on you know you want to)
- 1 x bunch of coriander chopped
- 1 cup of bean sprouts
- Handful of roughly chopped peanuts
Mix the following in a bowl;
- 1/4 cup soy sauce
- 2 tablespoons of lime juice
- 1 tablespoon of brown sugar
- Sambal oelek or chilli sauce (to taste)
Putting it all together;
- Cook noodles in a saucepan of boiling water for 5 - 10 minutes, until soft. Do not over cook them. Drain and set aside
- Heat wok, with oil…..swirl the oil around to coat the wok.
- Add egg, swirl the egg a bit to create a omelette. Remove, place on paper towel. When cold chop it into 2cm cubes (ish)
- Heat oil in wok. Stir fry onion, garlic, and capsicum over high heat for 3-4 minutes.
- Add noodles, tossing well.
- Throw in omelette, tofu, spring onion and coriander
- Pour sauce mix over the noodles and toss well.
- Sprinkle with bean shoots and nuts.
I serve this with condiments on the side - chilli, basil, salt, cut lemon and lime….people can then adapt it to suit their personal taste.
Vegetarian Spring Rolls

You will need
100g
packet vermicelli noodles
1
tablespoon peanut oil
3 shallots,
sliced
2 garlic
cloves, crushed
1 large
carrot, peeled, coarsely grated
1 ½ cups shredded Chinese cabbage
1 x can
water chestnuts, drained, roughly chopped
1
tablespoon soy sauce
A hefty
shake of pepper white pepper
2
teaspoons cornflour
20
frozen spring roll wrappers (21.5cm square), thawed
Vegetable
oil, for frying
Optional
Extras: cashews, mint, coriander, curry powder (I used them all)
What you need to do;
·
Place noodles in a large, heatproof
bowl. Cover with boiling water. Stand for 5 minutes or until soft. Drain. Using
scissors, cut noodles into 3cm lengths.
·
Heat a wok over high heat until hot.
Add peanut oil. Swirl to coat. Add onion, garlic, carrot and cabbage. Stir-fry
for 2 to 3 minutes or until soft. Add noodles, water chestnuts, soy and pepper.
Transfer to a bowl. Set aside to cool.
·
Combine cornflour with 1 tablespoon
water in a small bowl.
·
Place 1 wrapper on a board with a
corner pointing towards you. Brush edges with cornflour mixture (keep remaining
wrappers covered with damp tea towel).
·
Spoon 1 tablespoon vegetable mixture
into corner of wrapper. Fold corner over filling then roll up from corner to
corner, folding edges in to enclose filling.
·
Repeat with remaining wrappers,
cornflour mixture and filling.
Saturday, December 14, 2013
Spaghetti with Lemon, Rocket, Basil and Cashews
Spaghetti with Lemon, Rocket and Basil
What a lovely meal this is. I made the
spaghetti from scratch, having received a pasta machine as a gift last year. I
have decided it is time to take charge and command of the kitchen. Too often
recently I/we have resorted to quick and easy – which doe not always equate to
healthy.

To make the pasta you will need:
· 400 grams of flour – Graded 000 pasta flour or plain
· 4 fresh eggs (straight form
Cluckingham Palace – thanks ladies)
The rest is very easy. Simply prepare the
following, place it in a large bowl.
The following are rough guesses. I simply
cook prepare this according to my tastes, what is available in the garden and
what happens to be convenient. Except for the oil, feel free to chop and change
accordingly
· 300g Rocket
· zest from one lemon
· handful of basil - chopped
· 1 small chilli chopped
· 125ml of extra virgin olive oil
· ½ cup of finely grated parmesan
cheese
· handful of cashews, chopped
When the pasta has cooked, drain and toss
it through the ingredient prepared in the bowl. Season with sea-salt and pepper
Subscribe to:
Posts (Atom)